The Complete Beginners Guide To Making Espresso At Home

Why should you brew espresso at home?
For coffee aficionados, nothing beats a perfect shot of espresso. And while visiting your local cafe can be an enjoyable ritual, there's something special about crafting espresso in the comfort of your home. From experimenting with different beans to adjusting brewing parameters to suit your taste, home espresso brewing offers endless possibilities.
In this guide, we'll explore everything you need to know about making espresso at home. Whether you're a beginner or an experienced home barista, these steps will help you master the art of espresso brewing in your kitchen.
Equipment
Espresso Machine
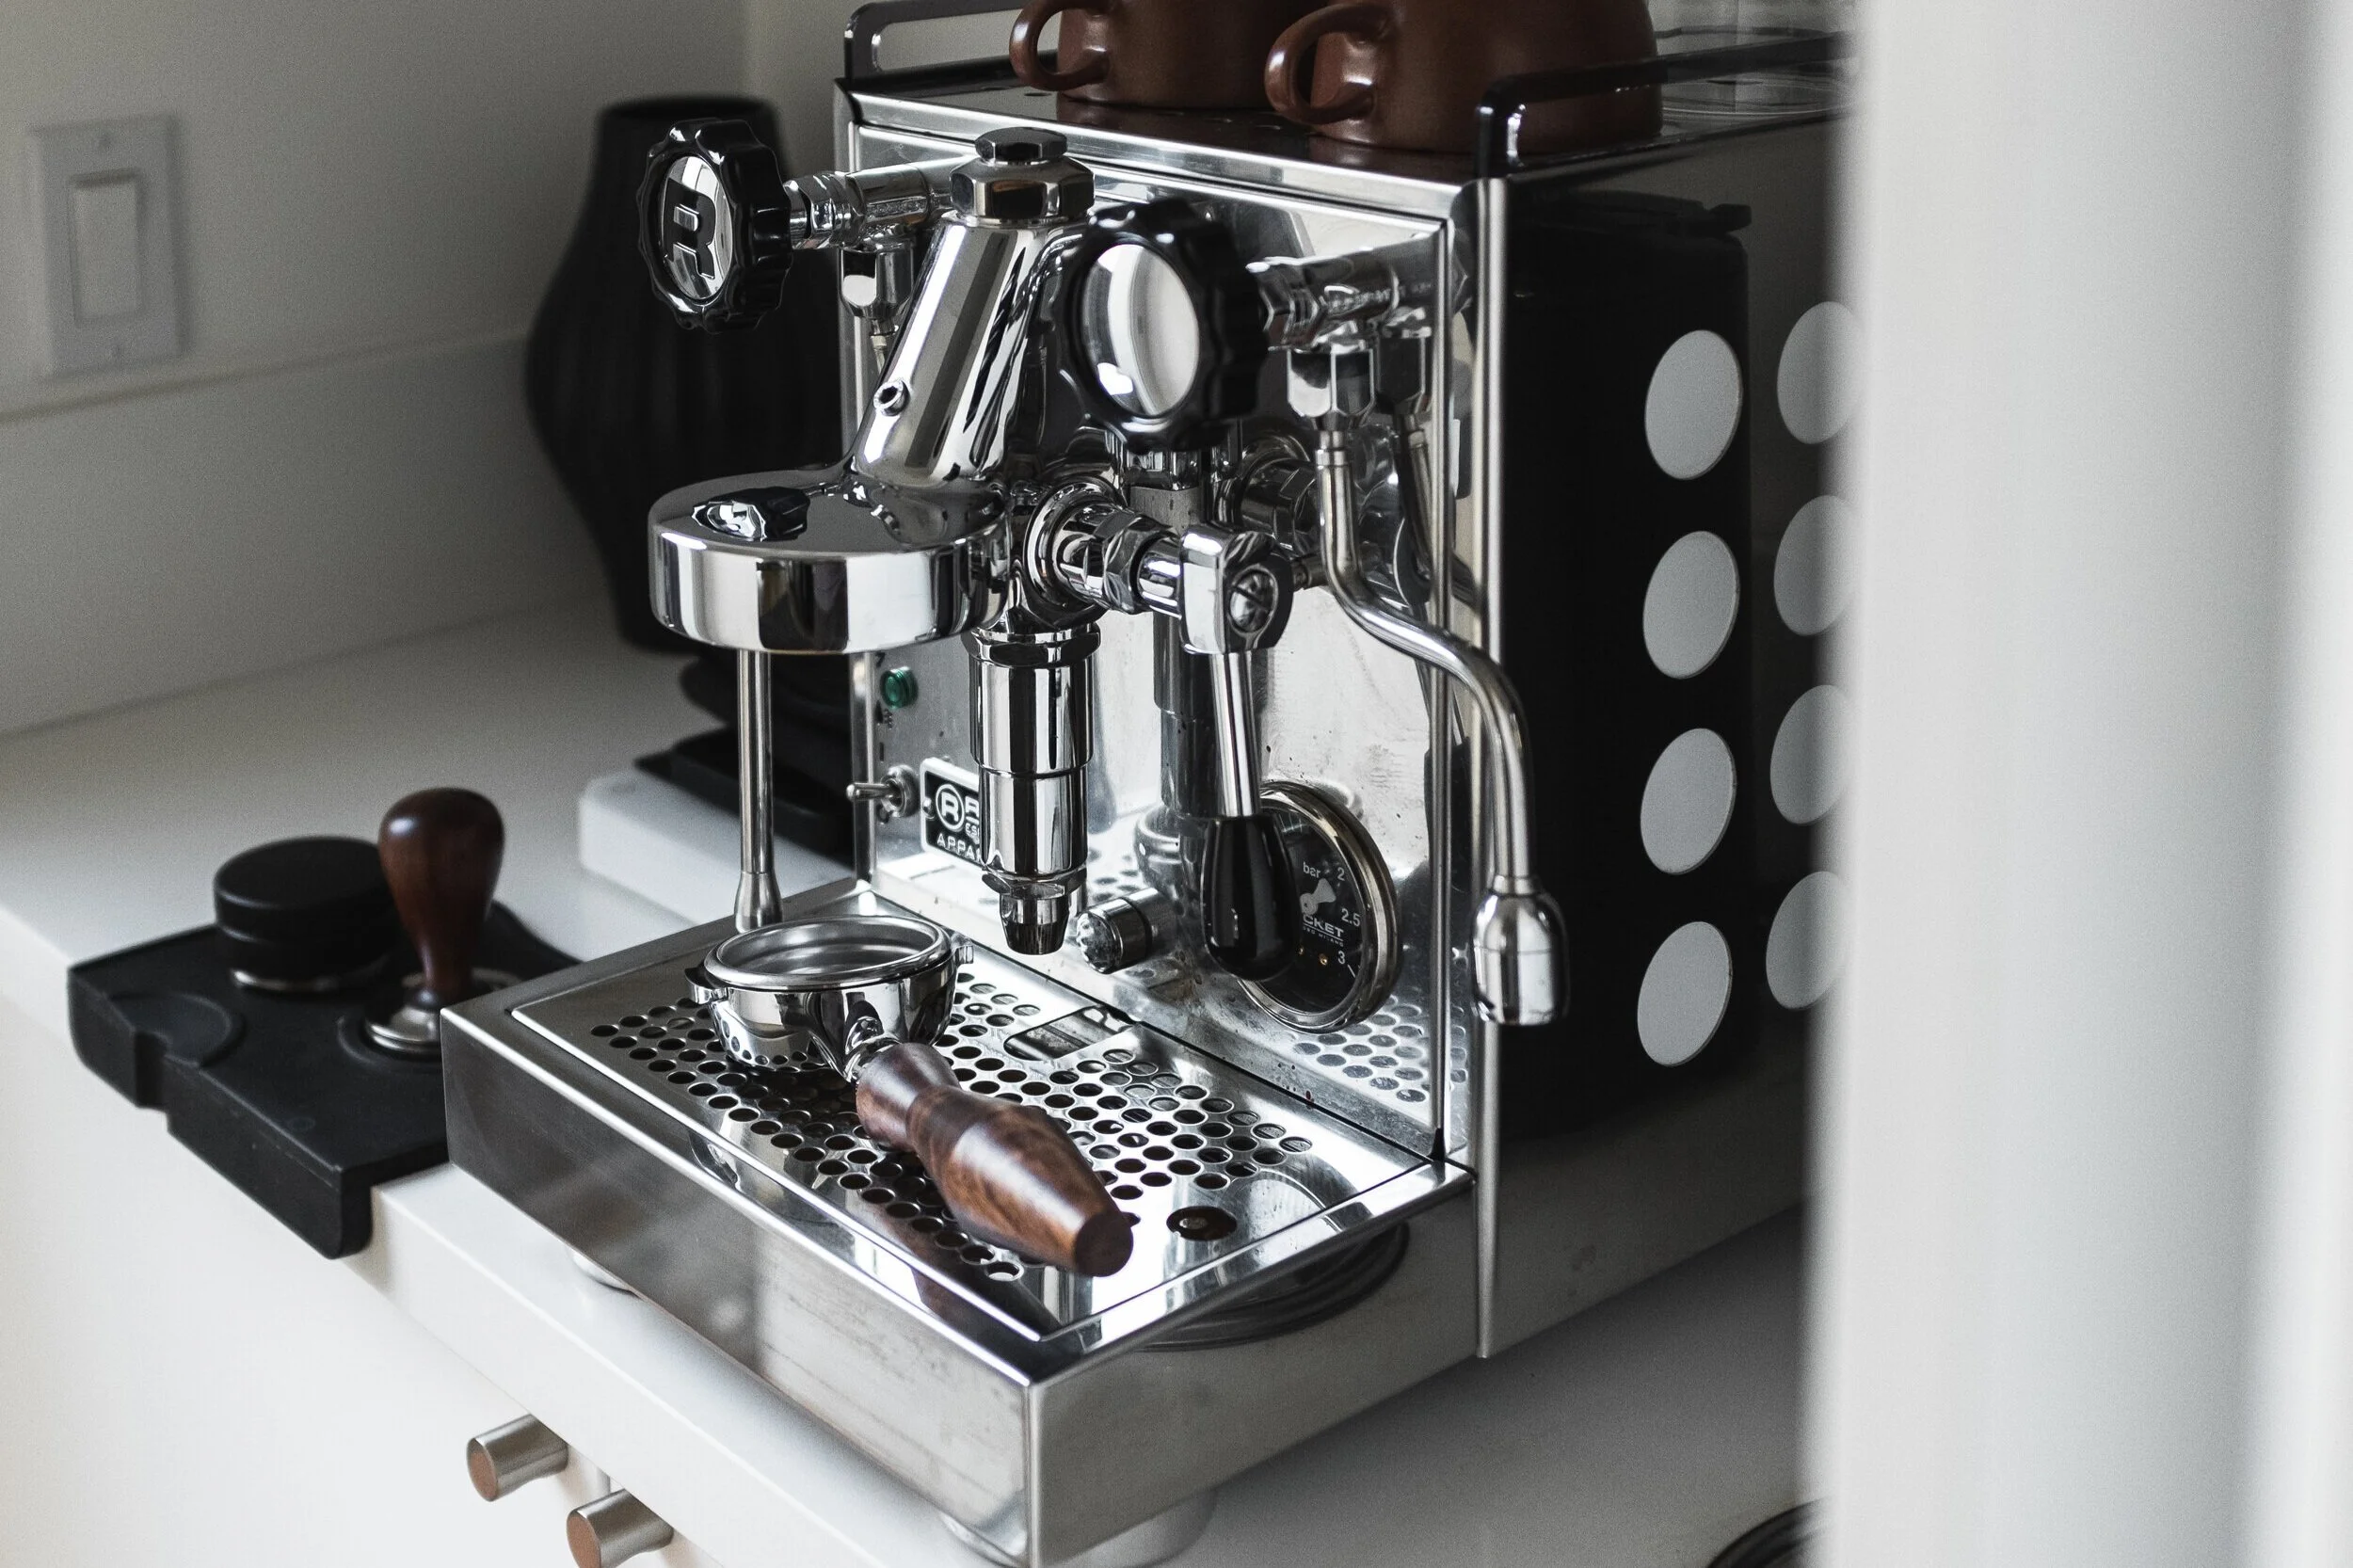
The espresso machine is the heart of any home barista's setup. It's the tool that takes your finely ground coffee beans and transforms them into that magical shot of espresso, complete with a rich crema and intense flavor. Here's a deeper dive into the components and types of espresso machines commonly used at home.
There are many home espresso machines available to buy with significant price differences, so here are a few key features to look for when choosing a machine:
Boiler
The boiler heats the water to a specific temperature, usually between 195°F and 205°F (90°C to 96°C). There are typically two types of boilers:
Single Boiler: These machines have a single boiler for brewing and steaming milk, which means you'll have to wait for the machine to switch from brewing to steaming (or vice versa).
Dual Boiler: These machines have two boilers, one for brewing and another for steaming milk.
Higher end models tend to have a dual boiler which allows you to steam milk and brew at the same time. This is great for making multiple drinks in quick succession however for most people brewing 1 or 2 drinks a day, a single boiler will be fine.
Filter Basket Size
This is the part which you put your ground coffee in for making espresso. The filter basket size is mainly down to personal preference. Most commercial espresso machines have 58mm basket however home espresso machines tend to range between 51mm and 58. The only difference is that a larger basket will use more coffee grounds and therefore you may extract a fuller flavour.

Pressurised vs Non-Pressurised Filter Baskets
For a better tasting espresso you will want to choose a machine with a non-pressurised filter basket.
It requires a good technique to get the grind size right for a good extraction when compared to a pressurised basket, but you will get a much fuller and better tasting espresso.
Pressurised baskets are better for beginners as there is less variance in taste from grind size (good for those using pre-ground coffee).
Manual vs Semi-Automatic vs Automatic Espresso Machines - What’s the difference?

Manual Espresso Machines
These are the traditional espresso machines where you control every aspect of the brewing process manually, from grinding and dosing the coffee to controlling the pump pressure. They require a high level of skill and precision but offer the most hands-on and customizable experience.
Brewing Time: High Control: High Drink Quality: High Ease of Use: Hard
Popular models include the La Pavoni PC-16

Semi-Automatic Espresso Machines
These machines automate the water flow and temperature, but you still have control over the grind size, coffee dose, and tamping. They are more user-friendly than manual machines but still offer a high level of control over the brewing process.
Brewing Time: Medium Control: Medium Drink Quality: High Ease of Use: Medium
Popular models include the Breville Bambino, Gaggia Classic Pro, Rocket Apartmento

Automatic Espresso Machines
These machines automate the entire brewing process, from grinding and dosing the coffee to controlling the pump pressure and water temperature. They are convenient and suitable for beginners, but they offer less control and customization compared to manual or semi-automatic machines.
Brewing Time: Low Control: Low Drink Quality: Low-Medium Ease of Use: Easy
Popular models include the De’Longhi Magnifica Evo, Philips 4300 Series
Coffee Grinder

A coffee grinder is essential when making espresso because the quality and consistency of the grind significantly affect the flavour and extraction of the coffee.
The grinder is one of the most important parts of your setup. A general rule of thumb is to spend as much as you would on a grinder as you would on your espresso machine.
Look for a burr grinder (not blade), either electric or manual, however a manual grinder can be laborious when serving multiple drinks.
Choose a grinder that has a uniform grind size and can grind fine enough for espresso as many cheaper ones won't - most grinders will state whether they are suitable for espresso.
Popular models include the Eureka Mignon, Breville Smart Grinder Pro and the Niche Zero

How to choose the right coffee grinder for home espresso
READ ARTICLE
Barista Tools
Barista tools play a significant role in ensuring that coffee beverages are brewed accurately, consistently, and efficiently, contributing to the quality and enjoyment of the final product. They are crucial for both professionals in commercial settings and home enthusiasts looking to elevate their coffee-making skills.
Here are a range of tools you can purchase for your setup which make brewing café quality espresso a lot easier. We’ve separated them into Essential Tools (what you need to get started) and Nice to Have Tools (great if you want to take your espresso to the next level).

Tamper (Essential)
A tamper is used to pack the coffee grounds evenly and firmly into the portafilter basket. A good tamper fits the portafilter basket snugly and has a handle that is comfortable to use. Make sure you purchase one that fits the size of your portafilter basket.
Popular models include the Normcore V4

Milk Frothing Pitcher (Essential)
A milk frothing pitcher is used to steam and froth milk for drinks like lattes and cappuccinos. It typically has a spout for easy pouring.
Popular models include the De’Longhi DLSC060

Scales (Essential)
Precision is key in making espresso, and scales help measure the weight of coffee grounds and the amount of extracted espresso. This ensures consistency in every shot. Look for one with a built in timer and increments of 0.1g.
Popular models include the Hario V60 Scales
Timer (Essential)
Timing the extraction process is crucial for achieving a balanced espresso shot. A timer helps keep track of the extraction time, which typically ranges from 20 to 30 seconds. We recommend either using your phone stopwatch or buying a pair of scales with a built in timer.

Distributor/Leveler (Nice to Have)
A leveler is used to distribute coffee grounds evenly in the portafilter basket before tamping for a consistent, even espresso extraction.
Popular models include the Normcore Leveler

WDT Tool (Nice to Have)
The WDT tool is used to distribute coffee grounds evenly in the portafilter basket before tamping. It effectively replaced the need for a distributor/leveller however some baristas still use both.

Dosing Funnel (Nice to Have)
The dosing funnel is a small funnel-shaped accessory designed to fit snugly inside the portafilter basket, providing a more precise and controlled way to add coffee grounds during the dosing process.
Popular models include the Normcore Dosing Funnel

Cleaning Brushes (Nice to Have)
Regular cleaning is essential to maintain the espresso machine in top condition. Cleaning brushes are used to remove coffee grounds and residue from the portafilter, group head, and steam wand.

Knock Box (Nice to Have)
A knock box is a container for knocking out used coffee grounds from the portafilter. It helps keep the work area clean and organized.
Popular models include the Breville Knock Box
Beans
What type of beans to buy

Like any good cook, sourcing the best ingredients is key to a great tasting meal, this is also the case when making coffee.
It's important to buy fresh, high quality and suitable beans for brewing espresso. Traditionally, espresso is brewed using dark roasted beans as it produces a powerful, full bodied shot and also tastes better topped with milk for cappuccinos and lattes.
There are many different types of dark roast beans available to buy from different regions around the world, the coffee should have a taste description on the packet stating flavours such as chocolate, berries and nuts.
Where to purchase them from
Generally, the fresher the coffee bean, the better it will taste and the thicker crema you will get on your espresso.
It's important to look at the roast date on a packet of beans to check how old they are. It's recommended to buy beans no older than 2 weeks a past the roast date for best flavour.
Supermarket beans don't tend to have the roast date on and can often be sat on the shelves months after the roast date. For the freshest beans, it's always best to purchase from a local coffee roaster.
How to store and keep fresh
Once you've bought your beans, keeping them fresh by storing correctly is crucial for making great espresso and preventing the beans from going stale.
Always store them in an airtight container out of direct sunlight. Never leave beans exposed to fresh air for too long as this can make them go stale quicker and therefore loose their flavour.
Brewing Espresso: Step by Step Instructions to Brew Espresso at Home
Making espresso is a straight forward process however there are certain aspects that determine the quality of your espresso shot.
The process of making espresso consists of grinding your coffee beans, tamping the beans in your portafilter basket, placing your portafilter into your machine’s group head and then brewing a 20 second single or 25-30 second double shot.
The steps below explain how to develop your technique for the perfect shot of espresso.

Prepare the Espresso Machine
Ensure the espresso machine is clean and properly maintained. Fill the water reservoir with fresh, filtered water and allow the machine to heat up.

2. Grind the Coffee (How to find the right grind size for espresso)
When brewing a shot of espresso, it's important to make sure your grinder is set up correctly to grind the perfect shot, this is called 'dialling in'.
Measure out the appropriate amount of coffee beans for a single or double shot of espresso. The grind size should be fine, similar to table salt or powdered sugar. Grind the beans just before brewing for the freshest flavor.
The grind should not be too course or too fine in order to product a well extracted shot.
The ideal double espresso shot should take between 25 to 30 seconds to brew and you should look for a quantity of a 1:2 ratio (commonly 18 grams of coffee grinds in, 36 grams of liquid coffee out).

If the extraction takes longer than 30 seconds, your grind is too fine and therefore you will need to grind courser. You can also tell by the taste as it will be very bitter.
On the other hand, if your espresso takes less than 25 seconds to brew it will be under extracted and taste salty/sour. You will need to make your grind setting finer for a slower extraction.
When you hit that sweet spot of 36 grams of coffee in 25-30 seconds you should have a well extracted and tasty shot. From here you can make small adjustments to grind setting and ratio based on taste.

3. Dose and Distribute the Coffee
If you're using a dosing funnel, place it in the portafilter basket and add the freshly ground coffee. Use a distribution tool (like a WDT tool) to evenly distribute the coffee grounds in the portafilter. If you don't have a dosing funnel, simply dose the coffee directly into the portafilter and use a distribution tool or your fingers to evenly distribute the grounds.

4. Tamping (The Ideal Technique for Home Espresso)
Tamping is a key part of making espresso.
You can use a tamper to compress the coffee grounds together in your filter basket to create coffee puck for water to pass through.
You need to make sure you apply enough pressure (approximately 30 lbs) to create a sufficient, well compacted coffee puck. This will create resistance and therefore allow coffee to pass through slowly enough to extract the full flavour of the bean.
Try to create an even tamp to avoid channelling. Channelling is when water passes through to quickly in a certain area due to gaps or an uneven coffee puck. Using a distributor tool can be really useful for a consistent, even tamp.
What To Look For When Brewing the Perfect Espresso

When brewing your espresso, there are certain things to look for to judge whether you have made the 'perfect' espresso or not. A great espresso should have a complex, balanced, and concentrated flavour profile that showcases the coffee beans' characteristics.
Taste: Obviously the first and most important one is taste. Your espresso should taste full bodied and have a good mixture of bitterness, acidity and sweetness.
Flavour: You should also be able to taste the flavours stated on the packet such as chocolate and berries. As mentioned above, if your coffee tastes too bitter, adjust your grind courser, if your coffee tastes sour, grind finer.
Crema: having a good amount of crema not only looks great, it's also a sign of how fresh the beans are. If your beans are old and going stale, you will have a thin crema and also a flat tasting espresso.
Remember that making espresso is both an art and a science, and it may take some practice to perfect your technique. Experiment with different coffee beans, grind sizes, and extraction times to find the flavour profile that suits your taste preferences.
Steaming Milk
Not everyone drinks espresso neat, most of us enjoy a milky latte or frothy cappuccino. Being able to create well textured, foamy milk is the perfect way to make coffee shop quality drinks at home. When using your milk steamer, it's recommended to follow these steps:
Purge your steam wand to remove any stagnant water
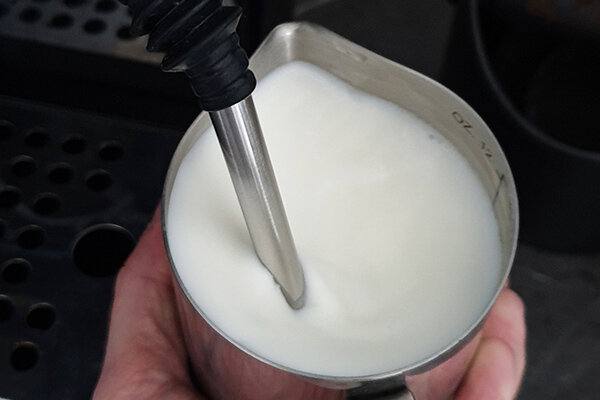
Put the tip of your wand below the surface of the milk (at a slight angle) in the milk pitcher and turn the steam on. This will aerate the milk to create the froth.
Keep one hand on the bottom of the milk pitcher. When you feel the pitcher start to warm up, submerge the steam wand further into the pitcher
3a. If you want more froth, keep your steam want just below the surface for longer. For less froth, submerge the steam wand sooner.
When the steam wand is submerged you should try and create a swirl movement in the milk from the steam power. This will give you a well textured foam. If you are struggling to get that swirl, try adjusting the angle of your steam wand or try different sized milk pitchers.
Once the pitcher feels too hot to touch (60 to 70 degrees Celsius), the milk will be the right temperature to serve. You can use a thermometer to check.
After steaming, make sure you purge your steam wand and clean it with a damp cloth.
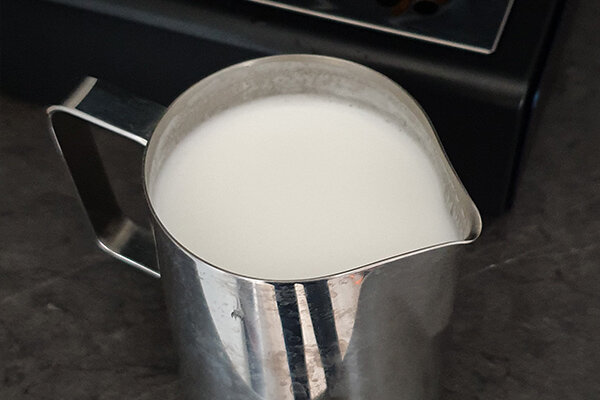
To get a good foam and texture in your milk, bang the bottom of the milk pitcher against the counter top to remove any large bubbles and swirl the milk around in a circular motion. This prevents the foam and milk from separating and helps create a consistent micro-foam texture.
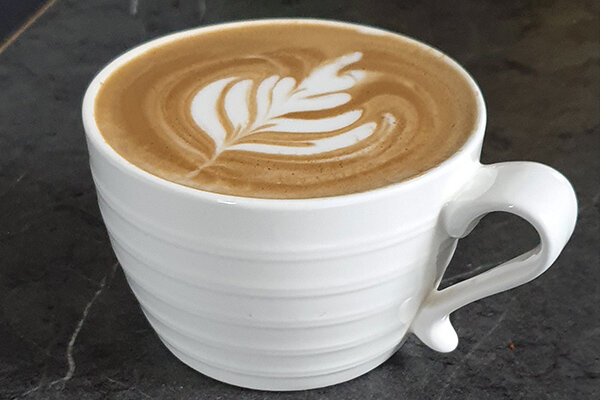
Now it's time to pour your milk. It's good practice to pour from above your mug until you've filled it half way, then more the pitcher spout closer for the remainder of the pour. This helps make a well mixed drink and perhaps even some latte art.
Machine Maintenance
It's important to regularly clean and maintain your equipment to keep it in the very best condition. Old coffee residue and general grime can lead to bad tasting coffee and reduced performance. It's recommended to follow the advice stated in your instruction manual as every machine is different, however here are a few basic machine cleaning routines.
Backflushing
Back flushing is a great way to remove old coffee residue that could effect the taste of your espresso. It's recommended to do this daily if you make lots of drinks every day, or once a week if you only make one or two.
To back flush, you will need a blanking plate and some espresso machine cleaner such as Puly Caff (view on Amazon).

1.Insert the blanking plate into your portafilter, add 1/2 a teaspoon of cleaner and then lock the portafilter into the group head
2. Turn the brew switch on for 10 seconds and then switch off (to release the pressure). Repeat this 5-8 times
3. Unlock the portafilter and then rinse away the cleaner

4. Reinsert the portafilter into the group head and repeat step 2 to rinse away the cleaner
5. Remove the blanking plate and then turn the brew switch on to further rinse away cleaner residue
6. You can also use 1 tea spoon of cleaner mixed with 1 litre of hot water in a bowl to soak the filter baskets and portafilter
7. Leave to soak for 15 minutes then rinse with clean water
Descaling
Every few months it's important to descale your espresso machine to prevent water damage to your internal machine components. You can use a descaling agent such as WoldoClean (view on Amazon).
Dissolve the recommended amount (as stated on the bottle) of descaler into the espresso machine water reservoir
Put glass containers underneath the group head and the steam wand
Turn the steam wand on until about 1 cup of water has been dispensed, then turn off
Turn the machine off for 20 minutes to let the descaling solution work
Then dispense 1/4 of the water reservoir out of the steam wand and 1/4 out of the group head
Turn the machine off for another 20 minutes
Dispense the remaining solution out of the group head and steam wand
Now you should rinse the water reservoir and fill with plain water
Dispense the full water reservoir through the group head and steam wand to flush out the descaling agent
Refill the reservoir with fresh water and you'll be ready to brew again
Please note, the descaling and backflush methods above are general and may not be specific to your machine/cleaning solution. Always check the manufacturers instruction.
Making espresso at home is a fun and rewarding hobby to get in to. By following the tips above, you should be able to create your own espresso setup and start making coffee shop quality drinks at home. It may take some time to master the technique, particularly when dialling in your shot, but it’ll be worth it when you can enjoy a delicious and full-bodied espresso shot.